
How to Sharpen Kitchen Knives: A Simple Step-by-Step Guide
A sharp kitchen knife slides through a tomato skin without crushing it and glides through an onion with almost no pressure. A dull one slips, tears, and forces you to push harder than you should have to. This guide covers how to sharpen a kitchen knife on a whetstone, which grit to use and when, how sharpening actually differs by knife type, and what to do when the standard steps don’t go as expected.
Quick answer: For most kitchen knives, a whetstone gives you the most control over the sharpening angle and the final edge. Pull-through and electric sharpeners are easier to use but give you less control. Sharpen when honing no longer restores cutting performance, rather than on a fixed calendar — how long an edge lasts depends on the steel, the angle used, the grit finish, and how the knife is used and stored.
Sharpening vs. Honing: What’s the Difference?
These get confused constantly, and mixing them up is why some people hone a knife for weeks and wonder why it still won’t cut.
A traditional steel honing rod mainly realigns a slightly rolled edge rather than creating a new one — it doesn’t remove meaningful metal. Some ceramic and abrasive honing rods work a little differently: they can remove a small amount of metal while they realign the edge, which is why they feel like they “sharpen” more than a smooth steel rod does.
Sharpening, on the other hand, deliberately removes a thin layer of metal to create a new edge. It’s what you need once honing stops helping, because the edge itself — not just its alignment — has worn down.
If a few passes on a honing rod don’t restore the cut, honing isn’t the problem. The knife needs sharpening.
How to Know When a Knife Needs Sharpening
Three quick checks, none of which involve running a finger along the blade:
- Paper test: Hold a sheet of paper by one edge and try to slice through it with a smooth downward motion. A sharp knife cuts cleanly. A dull one catches, tears, or needs a sawing motion.
- Tomato test: Try to slice through the skin of a ripe tomato with light pressure and no sawing. If the skin dents or resists before the blade bites in, the edge has dulled.
- Light test: Tilt the blade under a bright light and look down the edge. A sharp edge comes to a point too fine to reflect light, so it looks like a thin dark line. A dull edge has a small flat spot that catches the light as a thin white glint.
Choosing the Right Sharpening Angle
There’s no single universal angle, but two starting points cover most double-bevel kitchen knives:
- Western-style knives (most German-made knives, and most all-purpose American knives): roughly 20 degrees per side, with a workable range of about 17 to 22 degrees.
- Japanese-style double-bevel knives (santoku, gyuto, nakiri, and most knives marketed as Japanese): roughly 15 degrees per side, with a range of about 12 to 17 degrees.
These ranges apply to double-bevel kitchen knives, where both sides of the edge are ground at roughly matching angles. Some traditional Japanese knives (yanagiba, usuba) use a single-bevel grind instead, where only one side is sharpened and the other stays flat — see the single-bevel section below. Sharpening one the same way as a double-bevel knife will damage the edge.
If you don’t know which category a knife falls into, 15 to 20 degrees per side is a safe starting range for a double-bevel knife. The angle is a trade-off, not just a technical spec: a lower angle produces a thinner, sharper edge that cuts more easily but chips more easily too, while a higher angle is more durable but takes slightly more force to cut with. Manufacturer specs, when available, should override these general ranges — for example, Wüsthof specifies its own Classic line at closer to 14 degrees per side, narrower than the general Western range above.
Choosing the Right Whetstone Grit
Grit number measures how coarse or fine the stone’s abrasive is. Lower numbers cut faster and remove more metal; higher numbers refine and polish. Skipping too far ahead — going straight from a coarse stone to a very fine one — leaves the deeper scratches from the coarse grit still under the surface, which weakens the edge instead of finishing it. Pass through the middle grit first.
| Knife condition | Starting grit | Finishing grit |
|---|---|---|
| Routine touch-up (still cuts, just losing bite) | 1000 | 3000–5000 |
| Very dull (fails the paper test entirely) | 400–800 | 1000–3000 |
| Small chips or nicks | 220–400 | 1000–3000 |
| Fine edge for delicate prep (fish, produce) | 1000–2000 | 3000–6000 |
For most home cooks, a standard kitchen knife doesn’t need to go past a 3000–6000 grit finish — that range gives a good balance of sharpness and a bit of “bite” for everyday cutting. Going to 8000–10000 grit is more relevant for enthusiasts and for hard, fine-grained steels (common on premium Japanese knives) that can actually hold that level of polish.
How to Sharpen Different Kitchen Knives
“Sharpen your knife” means something a little different depending on which knife is in your hand. This section covers the six knives most home kitchens actually use, plus traditional single-bevel Japanese knives, and how the approach changes for each.
| Knife | Typical edge | Typical angle | Grit (start → finish) |
|---|---|---|---|
| Chef’s knife | Double bevel | ~14–20° per side | 1000 → 3000–5000 |
| Gyuto | Double bevel, thin | ~15° per side | 1000 → 3000–6000 |
| Santoku | Double bevel, flat | ~15° per side | 1000 → 3000–6000 |
| Nakiri | Double bevel, thin | ~12–15° per side | 1000 → 3000–6000 |
| Paring knife | Double bevel | ~14–20° per side | 1000 → 3000–5000 |
| Bread knife | Serrated | Not stone-sharpened | Tapered rod, not graded by grit |
| Yanagiba / usuba | Single bevel | ~10–15°, one side only | 1000 → 3000–6000 |
Chef’s Knife
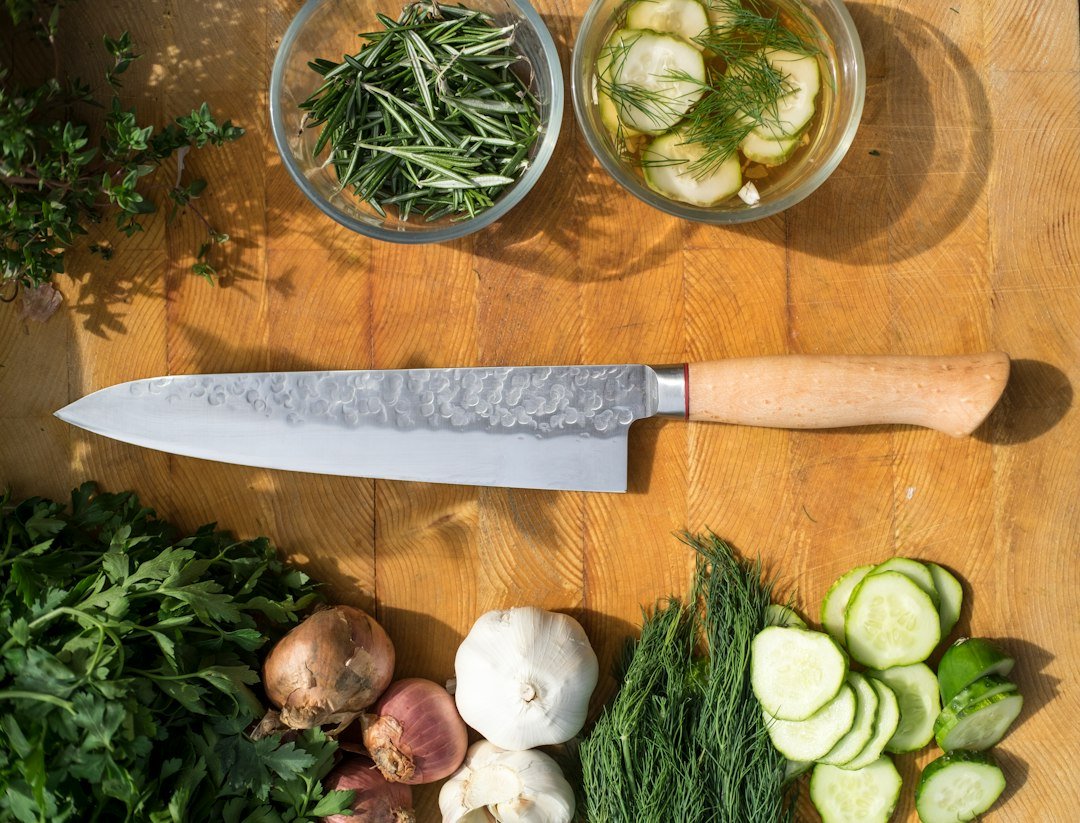
What it is: The all-purpose Western kitchen knife — a broad blade with a curved belly that lets you rock the tip on the board while chopping. Double bevel, sharpened on both sides.
Key features
– Typical blade length: 8″ (200mm)
– Blade profile: curved belly for a rocking cut
– Common steel: German stainless alloys (e.g. X50CrMoV15) or comparable high-carbon stainless
– Typical hardness where verified: around HRC 58 on forged German Classic-style knives
– Double bevel
– Best for: general chopping, slicing, and mincing
– Who it suits: anyone who wants one knife that handles most kitchen tasks
How to sharpen it
Manufacturer angles vary more than the general “20 degrees” rule of thumb suggests — some forged German knives are specified closer to 14 degrees per side, so check the maker’s spec before assuming 20. Start at 1000 grit for routine maintenance, finish at 3000–5000. Through the curved belly, rotate your wrist slightly as you draw the blade so the angle stays constant instead of lifting off the stone at the curve. The most common mistake is applying even pressure the full length of the stroke despite the curve, which over-sharpens the flatter middle of the blade and under-sharpens the heel and tip. That’s true regardless of the steel pattern — a Damascus chef’s knife sharpens the same way as a plain one, since the layered pattern is cosmetic and doesn’t change the angle or grit you need.
Example knife to consider: Wüsthof Classic 8″ Chef’s Knife — forged X50CrMoV15 German stainless, HRC 58, 200mm blade (335mm overall, 265g), factory edge around 14° per side, made in Solingen, Germany.
Price checked: about $170 at KnifeCenter (research conducted September 2026; verify current price before publishing).
Where to buy: Wüsthof (manufacturer) or authorized retailers.
View on Wüsthof
Gyuto
What it is: The Japanese-style counterpart to a chef’s knife — thinner, lighter, with a flatter profile than a Western chef’s knife but still enough curve for a rocking cut. Double bevel.
Key features
– Typical blade length: 210mm (8.3″)
– Blade profile: thin, tapering geometry (some models run about 1.8mm at the spine down to 0.8mm near the tip)
– Common steel: VG-10 core with softer stainless cladding (san mai / 3-layer construction) is common
– Typical hardness where verified: around HRC 60 on VG-10 core models
– Double bevel, generally a lower angle than a Western chef’s knife
– Best for: the same general tasks as a chef’s knife, with less resistance through the cut
– Who it suits: cooks who want a lighter, more precise all-purpose knife and are comfortable handling a thinner edge carefully
How to sharpen it
Around 15 degrees per side is the typical starting point. The harder core steel (often HRC 60+) takes a bit longer to grind on a coarse stone than softer Western steel, but rewards a finer finishing grit (3000–6000) for a delicate prep edge. Handle the curved tip the same way as a chef’s knife. The most common mistake is sharpening at a Western 20-degree angle out of habit — that blunts a gyuto’s thinner geometry faster and can make a hard, brittle edge more prone to chipping than it needs to be.
Example knife to consider: Tojiro DP Gyuto 210mm — VG-10 core, 3-layer stainless clad, HRC 60±1, 210mm blade (335mm overall, 180g).
Price checked: about $128 (reported February 2026 by a retail price-tracking source — reverify before publishing, since Japanese-knife pricing moves often).
Where to buy: specialist retailers such as Chef Knives to Go.
View at Chef Knives to Go
Santoku
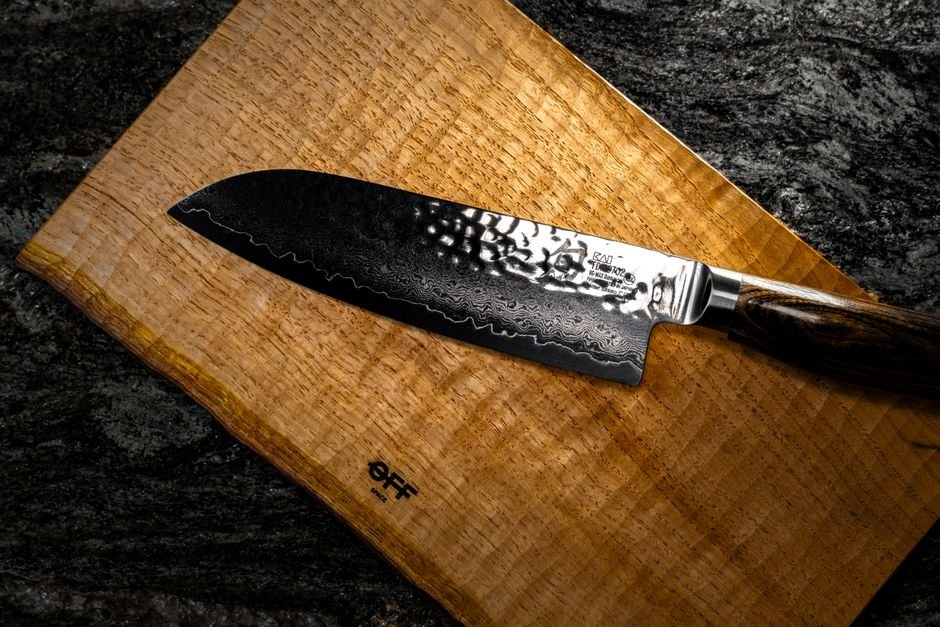
What it is: A shorter, flatter Japanese-style all-purpose knife. The cutting edge is flatter than a chef’s knife or gyuto, which favors an up-and-down chop over a rocking motion. Double bevel.
Key features
– Typical blade length: 6.5″ (165mm)
– Blade profile: flatter edge, shorter overall length
– Common steel: high-carbon molybdenum vanadium alloy or various stainless steels depending on maker
– Typical hardness where verified: around HRC 61 on some Japanese-made lines
– Double bevel, around 15° per side
– Best for: chopping vegetables and general prep in a shorter, lighter package
– Who it suits: cooks who find an 8″ chef’s knife too long or heavy for daily use — CityKnives stocks santoku knives in this size range
How to sharpen it
Around 15 degrees per side, starting at 1000 grit and finishing at 3000–6000. The flatter profile means there’s little curve to manage, but that also makes it easy to unconsciously favor the middle of the blade and under-sharpen the ends if your strokes aren’t consistent along the full length. The most common mistake is exactly that — an unevenly sharp edge that feels sharp in the middle and dull near the heel and tip.
Example knife to consider: MAC Superior Santoku 6.5″ — high-carbon molybdenum vanadium alloy, HRC 61, 165mm blade (1.87″ blade height, 5.7oz, 3mm spine thickness), 15° double bevel, made in Seki, Japan, with a 25-year warranty.
Price checked: about $120 at Cutlery and More (research conducted September 2026).
Where to buy: MAC Knife (manufacturer) or Cutlery and More.
View at MAC Knife
Nakiri
What it is: A rectangular-bladed Japanese vegetable knife with a flat edge and flat spine — no point, no curve. Built specifically for a straight push cut through vegetables rather than rocking.
Key features
– Typical blade length: 6.5″ (165mm)
– Blade profile: rectangular, flat edge and flat spine
– Common steel: VG-10 core, 3-ply clad construction on many Japanese-made lines
– Typical hardness where verified: around HRC 60 on VG-10 core models
– Double bevel, and often ground notably thin — some manufacturer lines report edge angles as low as 9–12° per side, narrower than a typical santoku (verify against the specific model before publishing this figure)
– Best for: straight-down vegetable prep
– Who it suits: cooks who do heavy vegetable prep and want a dedicated tool rather than an all-purpose knife
How to sharpen it
Roughly 12–15 degrees per side, or the manufacturer’s own spec if narrower. Start at 1000 grit, finish at 3000–6000. There’s no curved tip to manage, but that cuts both ways: the entire edge has to stay dead straight and even, since there’s no curve to disguise an inconsistent stroke. The most common mistake is rounding off the front and back corners of the blade by lifting the angle at the ends, which undoes the flat profile that makes a nakiri useful in the first place.
Example knife to consider: Tojiro Basic Nakiri VG-10 165mm — VG-10 core, 3-ply clad stainless, HRC around 60, 165mm blade, 4.8oz.
Where to buy: Cutlery and More.
View at Cutlery and More
Paring Knife
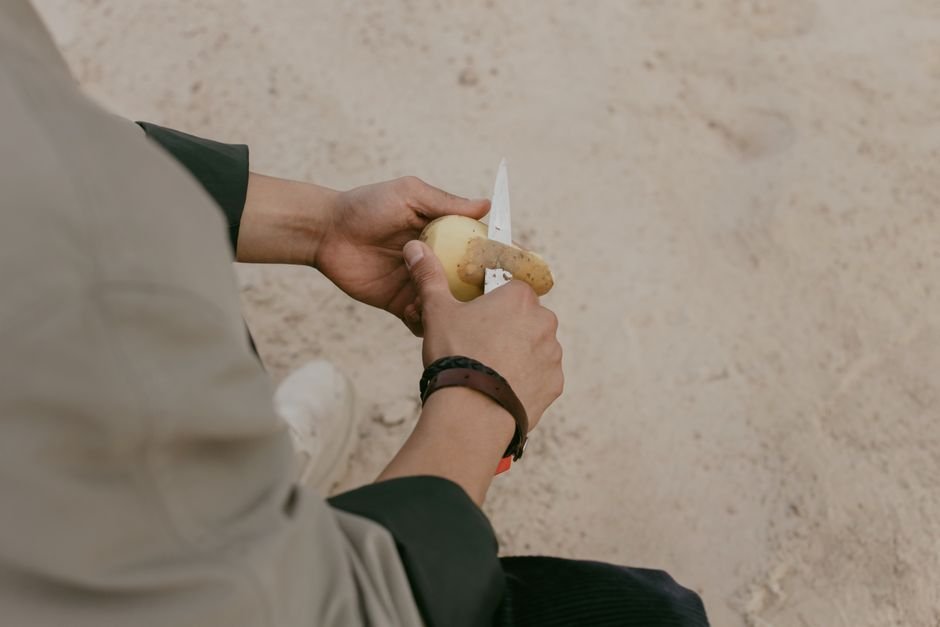
What it is: A small precision blade, usually 3 to 4 inches, meant for in-hand work — peeling, trimming, deveining — rather than cutting on a board.
Key features
– Typical blade length: 3.5″ (90mm)
– Blade profile: small, straight to slightly curved
– Common steel: often the same alloy as a maker’s chef’s knife line
– Typical hardness where verified: around HRC 58 on forged German Classic-style paring knives
– Double bevel
– Best for: peeling, hulling, deveining, small precise trims
– Who it suits: every kitchen needs one, but it doesn’t replace a chef’s knife — CityKnives carries paring knives for this role
How to sharpen it
Follow the same general angle as the maker’s chef’s knife line — commonly 14–20 degrees per side depending on brand. Start at 1000 grit, finish at 3000–5000. Because the blade is so short, a full sweeping stroke like you’d use on a chef’s knife doesn’t work well — use smaller, controlled movements and work the edge in shorter sections while holding the angle steady. The most common mistake is trying to use chef’s-knife-length strokes on a 3.5-inch blade, which makes it much harder to keep the angle consistent.
Example knife to consider: Wüsthof Classic 3.5″ Paring Knife — forged X50CrMoV15 German stainless, HRC 58, 90mm blade (190mm overall, 63g), factory edge around 14° per side.
Price checked: about $95 at KnifeCenter (research conducted September 2026).
Where to buy: Wüsthof (manufacturer) or authorized retailers.
View on Wüsthof
Bread Knife
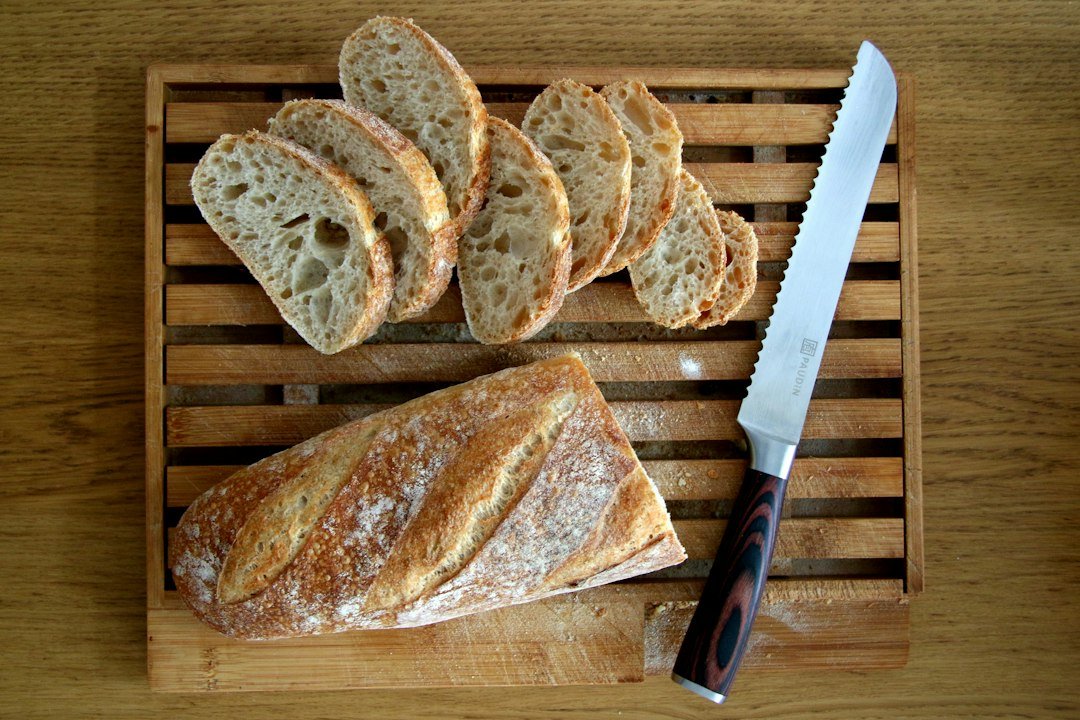
What it is: A long serrated blade designed to saw through a tough, crusty exterior without crushing whatever’s soft inside.
Key features
– Typical blade length: 8″ to 10.5″ (roughly 215–270mm) depending on brand and model
– Blade profile: straight, serrated (scalloped) edge
– Common steel: molybdenum vanadium steel or a VG-10 san mai construction, depending on the model
– Typical hardness where verified: around HRC 60 on some VG-10 san mai lines
– Serrated, not a plain double bevel
– Best for: bread, cake, and thin-skinned, soft-centered produce like tomatoes
– Who it suits: any kitchen that regularly cuts crusty bread
How to sharpen it
A bread knife isn’t sharpened on a flat stone at all — flattening the serrations would ruin what makes it work. Use a tapered sharpening rod sized to the serration gap, working each scallop individually, or a sharpener built specifically for serrated edges. There’s no grit-number system here the way there is for a flat edge; serration tools are generally labeled coarse or fine rather than graded by grit. The most common mistake is running a standard flat stone or pull-through sharpener across it, which grinds down the tips of the serrations and destroys the knife’s grip on a crust.
Example knife to consider: Tojiro Classic Bread Knife 215mm — VG10 stainless core, san mai construction with 13-chrome stainless cladding, HRC around 60, 212mm blade, 1.5mm spine thickness.
Where to buy: Chef Knives to Go.
View at Chef Knives to Go
Single-Bevel Japanese Knives (Yanagiba, Usuba)
What it is: Traditional Japanese knives ground on one side only, with the other face left flat. Yanagiba are built for long, single-draw slicing cuts in sushi and sashimi prep; usuba are the traditional single-bevel vegetable knife. These are not general-purpose knives.
Key features
– Typical blade length: yanagiba commonly range from 210mm to 300mm
– Blade profile: long, narrow, single bevel, flat back (the “ura”)
– Common steel: stainless monosteel (e.g. molybdenum vanadium) on entry lines, or traditional carbon steel (e.g. white #2 / shirogami) on higher-end lines, which typically runs harder
– Typical hardness where verified: roughly HRC 56–58 on a stainless monosteel line, closer to HRC 62 on a carbon-steel shirogami line
– Single bevel, sharpened on one side only
– Best for: long single-draw slicing cuts, not chopping or rocking
– Who it suits: cooks doing dedicated sushi or sashimi prep — a demanding first single-bevel knife if you’ve never sharpened one before
How to sharpen it
This is a genuinely different technique from everything above, not just a different angle. Nearly all the sharpening happens on the beveled side, roughly 10 to 15 degrees; the flat back only gets very light pressure to clear the burr, never full sharpening strokes. Because the geometry is so unforgiving of angle drift, this is worth learning from a dedicated single-bevel guide or in person before attempting alone. The most common — and most damaging — mistake is sharpening it like a double-bevel knife, working both sides evenly, which destroys the flat back that the knife depends on to cut correctly.
Example knife to consider: Tojiro MV Stainless Yanagiba 210mm — molybdenum vanadium stainless monosteel, HRC 56–58, 210mm blade (202mm edge length, 3.2oz), magnolia handle.
Price checked: about $96 at Cutlery and More (research conducted September 2026).
Where to buy: Cutlery and More.
View at Cutlery and More
How to Sharpen a Kitchen Knife on a Whetstone
What a Burr Is (and Why It Matters)
When you sharpen a blade against a stone, the metal you’re grinding away doesn’t just disappear — some of it curls over into a thin, almost invisible wire of metal called a burr, on the side opposite the stone.
The burr matters because it’s proof you’ve sharpened far enough on that side of the edge. Run a fingertip across the edge (never along it) and you’ll feel a slight catch or roughness where the burr has formed. Once you feel it along the full length of the blade, flip the knife and work the other side. The last step is a few very light passes on a fine stone to remove the burr entirely — without that step, the burr breaks off unevenly during the first few cuts and leaves the edge weaker than it should be.
The burr isn’t just a checkpoint — it’s the real signal that should tell you when to switch sides, not a fixed number of strokes.
The Whetstone Procedure
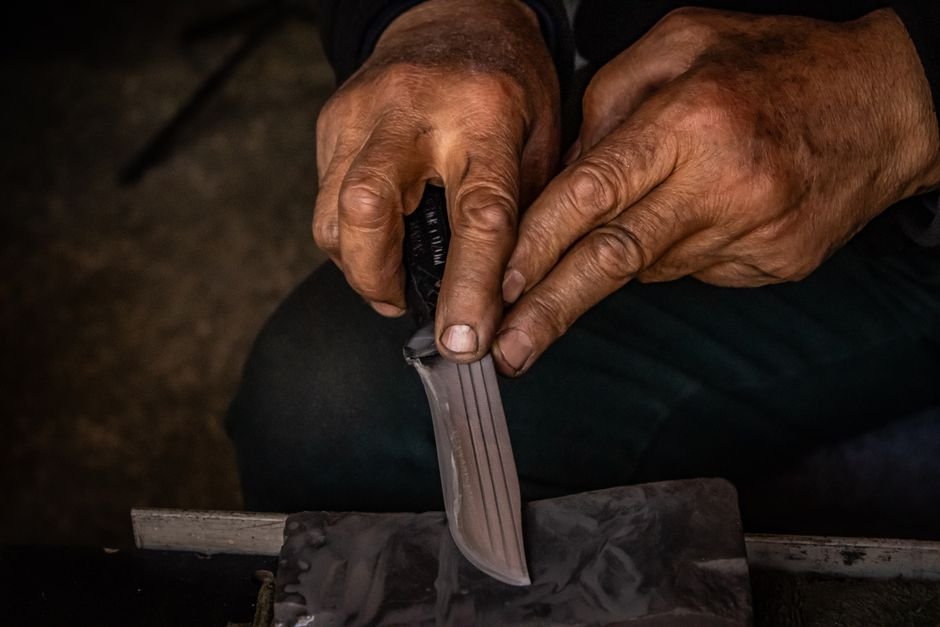
- Prepare the stone. Check the manufacturer’s instructions first. Some water stones need soaking for 10–15 minutes until bubbles stop rising; splash-and-go stones only need their surface wetted, and soaking them can actually damage them.
- Set your angle. Rest the blade against the stone at the angle for your knife type (see the sections above), and try to hold that angle steady for every stroke. Keep your fingers behind the spine of the blade as you work, and always draw the edge away from your body and hands.
- Work the coarse side first. Draw the blade across the stone from heel to tip in a smooth, consistent motion, using light to moderate pressure — a couple of fingers pressed just behind the edge is enough. Through any curved tip (chef’s knife, gyuto, santoku), adjust your hand position slightly to keep the same angle through the curve instead of letting the tip lift off the stone.
- Work one side until the burr forms. Check by feel every so often, running a fingertip across (not along) the edge. Stop once you can feel a consistent burr the full length of the blade — not after a fixed number of strokes.
- Flip and repeat. Sharpen the other side the same way until the burr forms there too. Skip this step for single-bevel knives — see the single-bevel section above for the correct technique.
- Move to a finer grit. Switch to a higher-grit stone and use noticeably lighter pressure than on the coarse stone, with shorter alternating strokes on each side, to refine the edge.
- Remove the burr. Finish with a few very light passes on the fine stone — lighter still than what formed the burr — alternating sides, until the burr is gone and the edge feels smooth.
- Rinse and dry. Wipe the blade clean and dry it fully. This matters most on carbon steel, which can spot with rust within minutes of being left wet, but it’s good practice on any knife. Use a stone holder, non-slip mat, or damp towel under the stone throughout so it can’t shift mid-stroke, and never test the edge by running it across your skin — use the paper or tomato test instead.
How Steel and Edge Geometry Affect Sharpening
Two knives can look similar and still sharpen differently, because both the steel and the shape of the edge change what happens on the stone.
Steel hardness. Harder steel (common on many Japanese knives, often HRC 60+) tends to hold an edge longer between sharpenings, but it’s also more brittle — it chips more easily if the angle is too shallow, and it generally takes longer to grind on a coarse stone than softer steel does. Softer knife steels (common on many German and general Western knives, often HRC 56–58) are usually quicker to sharpen and more tolerant of regular honing, but they typically need edge maintenance more often. Which finishing grit actually makes sense depends less on hardness alone and more on what the knife is used for — a slightly toothier edge can be genuinely useful even on hard steel, for example when cutting through bread crust or tougher produce, while a highly polished edge suits fine, precise cuts.
Edge geometry. Beyond the angle number, the shape of the edge changes the technique:
- Double bevel — both sides of the edge are ground, usually at matching angles. The most common style, and the easiest to learn on since the technique is the same for both sides.
- Single bevel — only one side is ground; the other stays flat. See the yanagiba/usuba section above for the full technique.
- Asymmetrical bevel — both sides are ground, but unevenly (for example a 70/30 or 80/20 split rather than 50/50), often on knives built for a specific dominant hand. Needs uneven stroke counts or pressure between the two sides to maintain the original ratio, not equal treatment.
- Convex edge — the bevel curves outward slightly instead of meeting at a flat angle. More common on outdoor and utility knives than kitchen knives, and harder to maintain on a flat stone without specialized technique.
- Serrated edge — a row of scalloped points rather than a continuous straight edge. See the bread knife section above.
Knowing which of these you’re holding matters more than knowing the brand — two knives that look similar from a distance can need completely different sharpening approaches.
Sharpening a Damascus knife
A Damascus knife sharpens like any other knife, with two differences. First, the edge angle: most Japanese-style Damascus knives are ground to 15 degrees per side, sharper than the 20 degrees on a Western knife. Match the angle the knife was ground to — sharpening at the wrong angle either wastes steel or leaves a weak edge. If your Damascus knife is a Western-style blade (some are), it may be ground to 20 degrees. Check the listing or the maker’s spec before you start. Second, the pattern: the Damascus layers are cladding, and aggressive sharpening can wear through the cladding near the edge. Use light pressure and a fine grit (3000 or above) for finishing. Do not use a pull-through sharpener on a Damascus knife — it tears the edge and can damage the cladding. A whetstone is the right tool. Full guide: How to Sharpen a Damascus Steel Knife
Sharpening Problems and How to Fix Them
No burr is forming after several passes. This usually means the angle is too shallow (the stone isn’t actually reaching the edge) or the pressure is too light for a coarse stone. Recheck your angle against the stone, and confirm you’re using light-to-moderate pressure rather than a barely-there touch — pressure should only get lighter once you move to finer grits.
Only part of the blade is getting sharp. This is almost always inconsistent angle or pressure along the length of the stroke — most people unconsciously press harder near the handle and lighter near the tip, or lift the angle up through a curved tip section. Slow down and check the angle in sections rather than assuming one stroke treats the whole edge the same way.
The edge has a chip in it. Removing a chip is a more aggressive version of sharpening — you need to grind the edge down to the depth of the chip to create a new, even edge, which takes off more metal than routine maintenance. Small nicks (roughly under a millimeter) are usually fine to fix at home with a coarse stone and patience. Larger chips (2mm or more), a damaged tip, or chips in an expensive or single-bevel blade are worth taking to a professional sharpener, who can reshape the edge without risking the knife’s heat treatment.
Caring for the blade right after sharpening. Rinse and dry the knife immediately either way, but carbon steel needs an extra step: after drying, wipe on a very light coat of food-safe oil before storing it, since carbon steel has little to no chromium and will rust noticeably faster than stainless if left bare. Stainless steel is more forgiving but still shouldn’t be left wet.
How Often Should You Sharpen Kitchen Knives?
For a knife used several times a week for normal home cooking, sharpening every 1 to 3 months is a reasonable range — more often for daily heavy use, less often for occasional use. But treat that as a loose planning guide, not a rule: the paper and tomato tests above are the real signal, since edge life depends on the steel, the angle, the finishing grit, the cutting surface, and how the knife is stored, not just the calendar.
Honing is a separate, more frequent habit: a quick pass on a honing rod before or after cooking realigns the edge and stretches the time between full sharpenings. Sharpening more often than needed isn’t harmless, either — every pass on a stone removes a small amount of metal permanently, so sharpening “just in case” shortens the knife’s usable life over the years.
Knife Sharpening Mistakes to Avoid
- Cutting on glass, stone, or ceramic boards. These surfaces are harder than the blade’s edge and dull it far faster than wood or plastic cutting boards.
- Storing knives loose in a drawer. The edge knocking against other utensils rounds and chips it over time.
- Using the wrong angle for the knife. Too shallow makes the edge fragile and prone to chipping; too steep makes it dull faster and cut less cleanly.
- Honing a knife that’s actually dull. A standard steel rod realigns an edge that still has its shape; it can’t fix one that’s genuinely worn down.
- Skipping the dry-off after sharpening. Leaving a blade wet, especially carbon steel, invites rust right along the freshly exposed edge.
Frequently Asked Questions
Can I sharpen a serrated bread knife the same way?
No. Flat stones and standard pull-through sharpeners are built for straight edges. Serrated knives need a tapered sharpening rod or a sharpener designed specifically for serrations.
Is it possible to sharpen a knife too often?
Yes. Each sharpening removes a small, permanent amount of metal. Sharpening on a fixed schedule regardless of actual dullness wears down a knife faster than necessary — sharpen based on the paper or tomato test, and hone in between.
Should I just get my knives professionally sharpened instead?
It’s a reasonable option, especially for repairing chips or restoring a badly neglected edge on an expensive or single-bevel knife. But learning basic whetstone maintenance is worth it for regular upkeep on everyday knives, since it’s faster and cheaper than sending knives out every few months.